Wpf is an advanced technology to build responsive user interfaces, but for many tasks (MessageBox, Folder Browser, Progress Dialog) you still have to use the old Windows Forms dialogs.
Windows 7 replaced this old forms with new ones to provide a better User Interface and a better feeling to their users.
But that’s what we want too: a better feeling for our users, especially when we have to display errors or common actions.
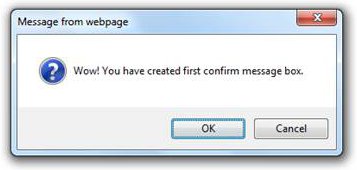
To make a visual example, this is the common WPF MessageBox:
and this is the Windows 7 messageBox:
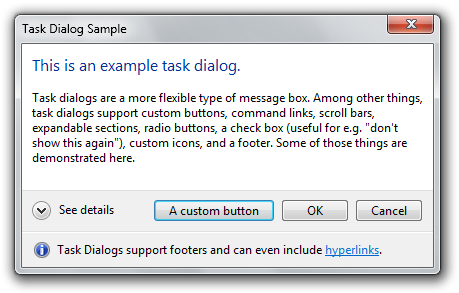
As you can see the latest is better, more informative, with an hiperlink that can be used to point to a FAQ html document, where you can add custom buttons and where you can hide the details (the stack trace) inside the detail-dropdown.
Using this MessageBox really add values to the application that you write, in terms of user experience.
Since this MessageBox is not built-in with WPF, you have 3 choices on how to use it:
1- Code it from scratch
2- Call the win32 API from your project, remembering to check if the user is on Windows 7 or on Windows XP.
3- Use an “already ready and well tested” library that calls the Win32 Api, exposes them in a nice way and do the job for you.
Ookii Dialogs library
This library contains some of the dialogs of Windows 7. You can download the source code from his site and embed it in your application.
Some interesting dialogs included in the library are also:
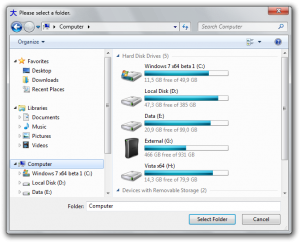
Folder Browser Dialog:
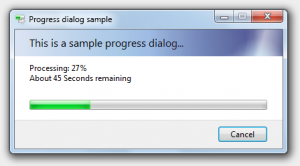
Progress Dialog:
What’s inside the file you download
When you open the rar file that you download you see:
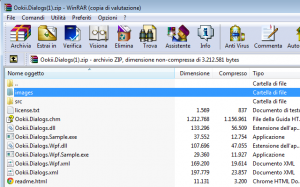
So the file contains one library (ookii.dialogs.dll) for Windows Forms and one for WPF.
You can grab the dll file that you need and add it as reference in your project, then start to use it.
Also the author provides the source code of the 2 projects (one project is for Windows Forms and one for WPF) and the examples to use all dialogs.
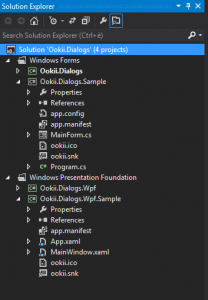
Examples
In the source folder, if you open the solution with Visual Studio, you will find the 2 examples that the author provide to use the library.
Anyway the code to use those Dialogs is really easy:
To show the MessageBox the code is this:
using( TaskDialog dialog = new TaskDialog() )
{
    dialog.WindowTitle = "Task dialog sample";
    dialog.MainInstruction = "This is an example task dialog.";
    dialog.Content = "Task dialogs are a more flexible type of message box. Among other things, task dialogs support custom buttons, command links, scroll bars, expandable sections, radio buttons, a check box (useful for e.g. \"don't show this again\"), custom icons, and a footer. Some of those things are demonstrated here.";
    dialog.ExpandedInformation = "Ookii.org's Task Dialog doesn't just provide a wrapper for the native Task Dialog API; it is designed to provide a programming interface that is natural to .Net developers.";
    dialog.Footer = "Task Dialogs support footers and can even include <a href=\"http://www.ookii.org\">hyperlinks</a>.";
    dialog.FooterIcon = TaskDialogIcon.Information;
    dialog.EnableHyperlinks = true;
    TaskDialogButton customButton = new TaskDialogButton("A custom button");
    TaskDialogButton okButton = new TaskDialogButton(ButtonType.Ok);
    TaskDialogButton cancelButton = new TaskDialogButton(ButtonType.Cancel);
    dialog.Buttons.Add(customButton);
    dialog.Buttons.Add(okButton);
    dialog.Buttons.Add(cancelButton);
    dialog.HyperlinkClicked += new EventHandler<HyperlinkClickedEventArgs>(TaskDialog_HyperLinkClicked);
    TaskDialogButton button = dialog.ShowDialog(this);
    if( button == customButton )
        MessageBox.Show(this, "You clicked the custom button", "Task Dialog Sample");
    else if( button == okButton )
        MessageBox.Show(this, "You clicked the OK button.", "Task Dialog Sample");
}
Remember that some Dialogs must be disposed, so surround them with a “using” or with a try-catch-finally to dispose them correctly, once closed.
You can download the source code from ookii website.
 Mesta Automation A blog about WPF, C# and PLC software development
